The toolbox log in process has changed and you will now access your toolbox by using your email address instead of an account number.
If you are logging into your account for the first time with an email, you will need to create a password as well as set up Multifactor Authentication, follow the ‘Create Toolbox Login’ process below.
If you have already logged in using an email and setup Multifactor Authentication, follow the ‘Existing User Login’ process below.
Multifactor Authentication
Multi-factor authentication (or MFA for short) is a security measure used to protect sensitive information by requiring multiple methods of authentication in order to access an account.
Traditional authentication methods rely solely on a username and password, which can be easily compromised. MFA adds an extra layer of security by requiring one or more additional factors to verify the user’s identity.
These additional factors include:
- Something the user knows, such as your password.
- Something the user has, such as a security token from an authenticator app.
By requiring multiple factors for authentication, MFA makes it more difficult for unauthorized users to gain access to an account even if they manage to obtain one of the authentication factors. It can significantly reduce the risk of data breaches, identity theft, and other security threats.
Create Toolbox Login
Follow these steps if you have not logged in using your email address or Authenticator app before.
Download an Authenticator app of choice if you haven’t already got one. This will be used later during the login process.
Click here to see how to get one and to learn more. See the FAQ below for additional information.
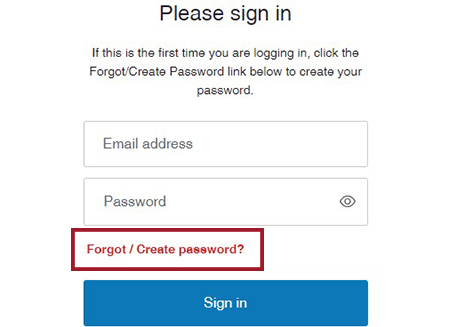
Browse to toolbox.onthenet.com.au to find the login page.
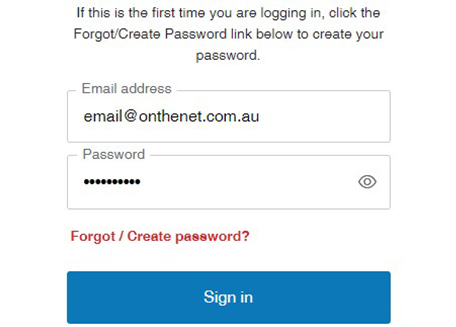
If this is the first time you are logging in with an email address, click the Forgot / Create Password link.
On the following screen, enter your email address. This is the email address that is associated with your account. If you are unsure, please contact us.
Click Continue for the password creation email to be sent to you.
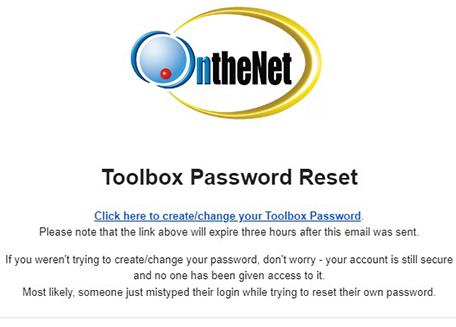
Once you have received the email, click the link to create your password.
If you did not receive an email, check your junk/spam folder. This email can also take several minutes to arrive.
If you don’t receive an email after a few minutes, you have entered an incorrect email address or an address that is not associated with your account. Contact us for assistance.
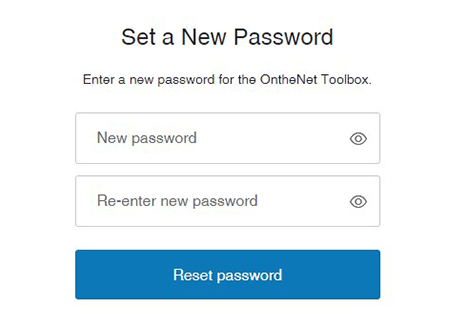
Enter your new password and click ‘Reset password’
You will see a success message when complete. Click the button to go back to the Toolbox login screen.
Once your password is created, log in using your email address and new password.
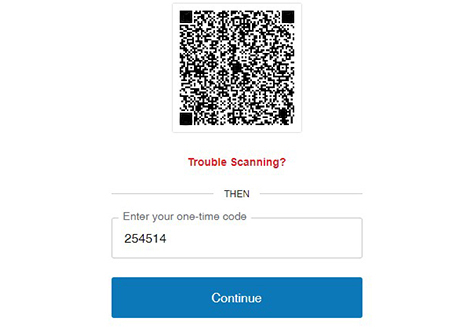
You will now be asked to scan a QR code.
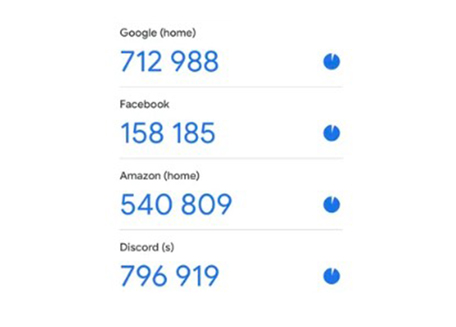
Open the Authenticator app on your device and scan the QR code to add the Toolbox account to your app. The app will then display a 6 digit one-time code which resets every 10-30 seconds. Using your phones normal camera will not work.
Enter that 6 digit code in the ‘one-time code’ field and click continue.
Note: Do not delete the Authenticator after following these steps as you will need it for future logins.
For more information on how to install and prepare your app, see the FAQ below.
Existing User Login
Follow these steps if you have completed the above guide to create your password and have already added an account to an Authenticator app.
Browse to toolbox.onthenet.com.au to find the login page.
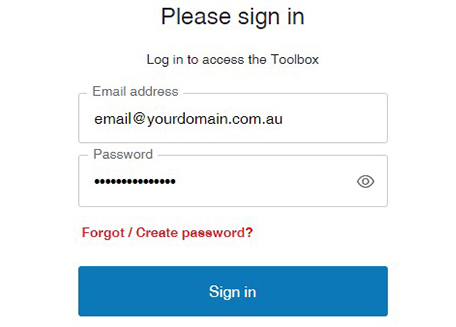
On the login screen, enter your email address. This is the email address that is associated with your account. If you are unsure, please contact us.
If you have forgotten your password, click the Forgot / Change password link.
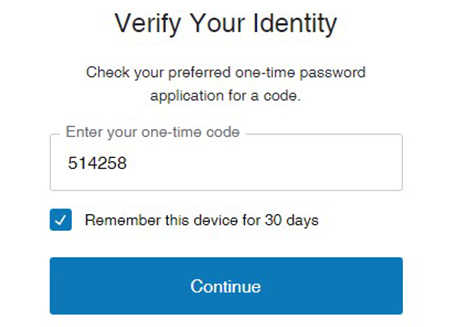
You will now be asked to enter a one-time code.
Open the Authenticator app on your device. The app will then display a 6 digit one-time code which resets every 10-30 seconds. Enter that 6 digit code in the ‘one-time code’ field.
Tick the “Remember this device for 30 days” and you won’t see this screen for another 30 days. This is not recommended if you are using a public device or device owned by someone else.
Click continue to log into the toolbox.
FAQ
You will need to use Multifactor Authentication when logging into the Toolbox unless you select the option to trust this device for 30 days which means you will only be asked for a code once in a 30 day period. This is not recommended if you are using a public device or device owned by someone else.
An authenticator app is a mobile application that generates a one-time code that resets every 10-30 seconds. These apps can be downloaded from an app store and are usually free of charge. We recommend ‘Google Authenticator’ or ‘Microsoft Authenticator’.
Other applications are available, please refer to the app’s user guide for assistance.
To set up and login, you will need to follow these steps:
- When logging into the toolbox with an email address for the first time, it is advised you login using a computer or tablet so you can use your phone to scan a QR code later. If you can only use your phone or if you don’t have a phone, see other options in this FAQ for assistance.
- When you are asked to set up Multi-factor Authentication. Download an authenticator app to your mobile phone if you haven’t already done so. Click here to see how.
- During the setup, you will be asked to scan a QR code and enter a one-time code:
- If using Google Authenticator: Press the plus (+) symbol in the bottom right and tap “Scan a QR code”.
- If using Microsoft Authenticator: Press the plus (+) symbol in the top right, then select “Personal account” and then tap “Scan a QR code”.
- Note: if this is the first time you have used this app, you will be asked to give the app permission to use the camera. You will also be asked to sign into your Google Account. This is recommended if you have an account, otherwise tap “use google authenticator without an account”.
- If you are using a different Authenticator app, please check that app’s user guide on how to add a new account.
- Your camera will now be active, aim your camera at the screen and scan the QR code given. This will add “OntheNet Account” to your chosen Authenticator app and show a code next to it, type this code into the one-time code field.
- Remember that this code changes every 10 to 30 seconds, if you are not a confident typer, we recommended you wait for the code to change to give you more time.
- Once the above has been completed, you will now be logged into the toolbox.
- Do not delete the Authenticator after following these steps as you will need it for future logins.
The next time you log in, you will only be asked to enter the code given by your authenticator app, you wont have to scan the QR code again. You will also be given an option to trust this device for 30 days. This is not recommended if you are using a public device or device owned by someone else.
It is advised that you first log in using a computer or tablet so you can use your mobile phone to scan the QR code when setting up Multifactor Authentication.
If this is not possible, you can add the OntheNet Toolbox account to your Authenticator app of choice by entering a code. Here is how you do this:
- When you see the QR code screen, tap on the “Trouble Scanning?” button.
- You will be presented with a code. Copy that code using the Copy Code button or write it down.
- You will need to use Google Authenticator for this to work, Microsoft Authenticator does not have the functionality.
- Google Authenticator:
- Tap the plus icon in the bottom right and tap on “Enter Setup Key”.
- Type OntheNet Toolbox in ‘Account name’ and enter the code you copied into the ‘Your key’ field.
- Leave everything else as is and tap ‘Add’.
- Copy the 6 digit code and go back to the MFA setup screen. Hint: Holding your finger down on the 6 digit code will copy it allowing you to paste into the code field.
- Enter the code and tap continue. You will now be logged in.
- Google Authenticator:
Tablet devices also have access to App Stores and can be used if available.
Otherwise, there are PC applications that can work. One example is an application called ‘Authy’. Click here to see their website.
To set up Authy:
- Download the application, it should run automatically. If not, find and run the downloaded file.
- Authy will require you to set up an account, follow the steps on screen. Your Authy account is not connected to your Toolbox.
- The application will first ask for a mobile number.
- It will next ask for an Email address.
- To complete the install, Authy will need to send you an SMS or email with a code. Follow the on screen steps to do this.
- Once complete you will be at the home screen in Authy.
- Follow the steps on this webpage to login to your Toolbox.
- When you arrive at the QR code step, click ‘Trouble Scanning’ and you will be given a string of letters and numbers, click ‘Copy Code’ to copy it.
- Go back to Authy and click the plus symbol (+) to add an account.
- Paste in the sting of letters and numbers and click ‘Add Account’.
- Enter an account name and colour code in the next screen and click save (leave other settings as they are).
- You will now be shown a 6 digit code similar to a mobile phone, enter that code into the toolbox when prompted.
Please contact us if you require assistance.
If you lost your phone or simply require your Multifactor Authentication to be reset, please contact our accounts team on 07 5553 9222.
Sometimes, the time on your Authenticator app or phone can fall out of sync with the MFA server. Follow these steps to correct this:
Google Authenticator:
- Tap the three dots in the top right and tap “Settings”.
- Tap “Time correction for codes”.
- Tap “Sync now”.
Microsoft Authenticator:
This app uses your phones time to sync, you will need to go to the time and date settings of your phone and ensure it is set to automatic.
Your computer’s date and time also needs to closely match your phone for the one-time code to work. If the date and time on your computer is incorrect, follow these steps to correct it:
Windows PC:
- Right click the time in the bottom corner of your screen.
- In the menu that appears, click ‘Adjust Date/Time’.
- In the next menu, turn on the setting labelled ‘Set the time automatically’,
- If that setting is already on, try turning that setting off and back on again to reset it.
Mac:
- Click the Apple symbol in the top left then click ‘System Preferences’.
- Click ‘Date & time’ to open time settings.
- Turn on the setting labelled ‘Set date and time automatically’
- If that setting is already on, try turning that setting off and back on again to reset it.
If the above does not work, you should close out of the login screen and the Authenticator app and try again. Rebooting your devices might also help.
Still having troubles?
Please contact our Support team who will happily guide you through the process if required.


